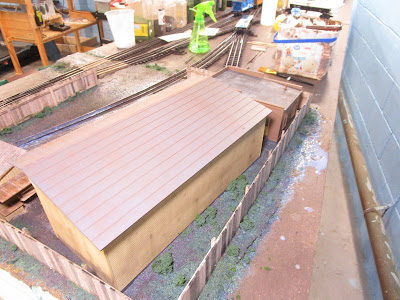
It was time to scenic the lumberyard. For that, I turned to "Ground Goop", a concoction so named by Lou Sassi and written about on my blog here. It is a combination of scenery materials, paint, and glue which forms a ground cover and does a great job of representing undulating earth. One of the components is Celluclay which is also the foundation for Sculptamold, but I haven't experimented with that yet.
Lou's recipe for Ground Goop is:
- 1 part Celluclay
- 1 part Vermiculite
- 1 part brown latex paint
- 2/3 or 3/4 part Elmers glue ("Glue All", not "School Glue")
- shot of Lysol liquid concentrate (I don't add this, but I don't make enough to have extra).
* add water to desired consistency (like oatmeal)
I make it in small batches of about 1 cup per part, which results in 4 cups of ground goop. It is pretty thick until you thin it with water, but be careful because if you thin it too much it makes a mess. You don't want it splashing on your structures or track. Wearing cheap disposable gloves is also recommended.

I put on disposable latex gloves and used an offset spatula (a cheap one I bought on Amazon for just this purpose) to spread it all over the base. I worked in small areas, focusing first around the edges where the fence would go and then around the railroad track. I avoided going directly near a structure's base, and I also didn't use it to fill between the rails. This stuff isn't difficult to wipe away if it goes in the wrong place, but I didn't want to risk splattering it on walls or the rails.
I smoothed it out as best I could. Spraying with rubbing alcohol helps a bit. However, my goal was to break up the perfectly flat surface left by the cork underlay as well as fill in any big gaps and holes around the scene. Some dips and bumps were fine, and in fact preferable, to a perfectly flat surface. For the road, I applied it much thicker along the edges and used it to build up angles where the ground rose to meet the road.
What I forget is that leaning over the edge of the road would get the goop on my T-shirt. Oh well, now I have a new "scenery shirt".
Then, I went over everything and sprinkled a layer of my extra fine dirt. I collect and process real dirt, and I have been waiting for nice weather to build up my supplies. I better do it soon as this scene just about used up all that I had left.


I clipped the fence posts flush with the bottom of the fence and then buried the fence carefully in the goop. This would hold it in place once dry. Next, I went around the perimeter and applied grass, weeds, and bushes to the inside and outside of the fence.

Normally I don't care about the areas behind buildings but here it is visible from the side of the layout so I didn't neglect it. I ran out of dirt and ground goop so I left the areas behind the fence mostly bare painted foam for now. In the future I will add some trees too.
I used up two grades of real dirt, six types of ground foam in various colors and sizes, and some of Brennan's "Superior Sand" which I liberally used on the road and lumberyard areas to look like gravel. All of this was sprayed further with rubbing alcohol and then secured with the remainder of my homemade matte medium. I discovered my matte medium was so old that part of it congealed, and I had little white gummy bits throughout my scenery that I had to later pick out with tweezers. Ugh. I threw out what was left after this project.
For between the rails of the siding, I just poured in dirt and then more sand. Ground foam weeds were scattered about, and the railheads were then cleaned.
I still need to add some larger bushes or trees, railroad crossing signs, a vehicle or two, and a track bumper to stop wayward freight cars. I also need to build security gates for both the road and track entrances, and perhaps more fence. So, this scene will keep me busy for a little bit more in the future. But I am happy with how it is turning out.


No comments:
Post a Comment