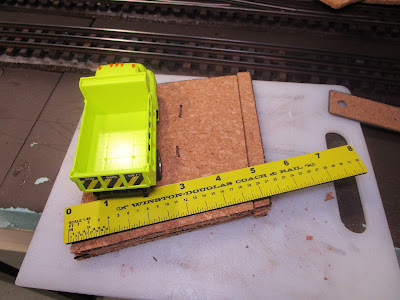
While I was doing that, I realized I might as well do the same thing for the area where the entrance road would cross the tracks. I wanted as much elevation change as I could get on this layout, as New England is anything but flat. That meant I didn't want the road to hit the tracks and suddenly veer up at a steep angle to cross them. The road should be on raised foundation like the train tracks.
When I previously marked the location of the road I drew it 25 scale feet wide, which seemed reasonable for a rarely used driveway. But when I set a 1:48 scale truck on it, it looked too wide for the scene. Instead of two narrow lanes, I instead cut the cork down a bit so that it was one overly-wide lane. That way, it wouldn't dominate the scene.

Using some 3/16" cork tiles I had on hand, I cut out two layers for the road's base. They were then glued in place with tacky glue and heavily weighted so that they would dry flat. They will later be topped with dirt and gravel. I later realized the road was still too wide so I trimmed it narrower again. After I add the slopes on the sides I think it will be perfect.
I used more 3/16" thick cork tiles to build up where the lumberyard would be. I quickly switched from tacky glue to clear latex caulk, which sped things up and did a better job filling in any gaps. Everything was pinned down using T-pins that by now were showing their age.
I attached a piece of cork to the inside of the foundation to bring it up to the level of the road, but realized I wouldn't have enough room to slope it down. So I removed it. I will need to use my actual dirt/gravel to make the transition but at least I would have to sand down the cork into a slope.
I ran out of cork tiles pretty quick. I planned to go to the craft store to buy some but I have been so busy that I didn't have time. What I did have was some used O gauge cork that a friend gave me. Funny... six months ago I was lamenting the lack of cork roadbed anywhere and now I had it in abundance! I used parts that didn't have any paint or plaster on them to fill in the rest of the area.
I even pulled out my small roller to help squish the caulk town into a flat layer.
When I ran out of pins I had to call it a day. But the next morning I finished it up.
Then, most of it was painted brown. It goes on light brown, but dries a nice dark color that matches my real dirt perfectly. Naturally, I ran out of paint so it will have to do.
Finally, the structures were glued down with latex caulk. Hopefully they will pop right off if I ever need to remove them.
I think I will need a lot of dirt to scenic this area, so I hope the weather warms up soon so I can go collect some.


No comments:
Post a Comment