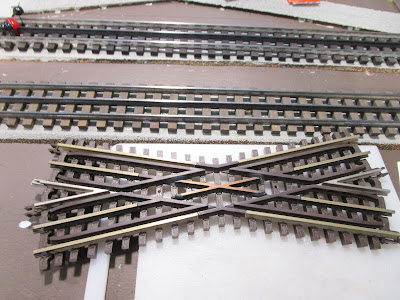
I use Gargraves track and Ross Custom Switches, and RCS does make a 22.5-degree crossing. Unfortunately, it is ugly! The center has a large metal diamond casting held down by screws instead of individual rails. You can see in the picture below that there is just no graceful way to scenic it. I wanted to model this track partially buried in the dirt and weeds and there was no way to do that with that big frog casting.

I understand that it is hard to fit three rails crossing three more rails in such a small footprint, especially since the outer rails need to be isolated from the inner rails to prevent short circuits. And you can't have the center pick-up roller drop down into gaps or lose contact either.
So I talked with Steve, the owner of RCS, about this. I asked him if it was possible to remove the frog casting and then use a milling machine to remove portions of it so that it was less visually bulky. He thought it might work. (Note: I would never try that on a mainline crossing but for some slow-speed industrial track it might work.) But I had another idea to try first.
Atlas O also sells a 22.5-degree crossing. With its scale profile rails, more open appearance in the middle area, and smaller ties it looks a lot more realistic too. I found a used one on Ebay at a great price so I bought it to experiment with. I want to see if I can get it to work with my Gargraves track. The ties are smaller and spaced closer together so it doesn't match the surrounding track. But it presented me with a challenge: could I transplant the Atlas crossing (rails/frogs) onto new ties that were spaced like the Gargraves track?
You can see the Atlas crossing in front and regular Gargraves track in the back.
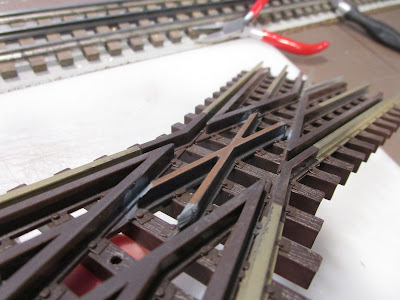
When I received it I noticed it was heavily used. Or maybe worn. Various areas were ground away and appeared light gray, which washed off like a powder. Perhaps it is the residue from plastic wheels banging into it. Also, it is made of at least four materials: plastic (ties), nickel silver (outer rails), copper/bronze alloy (center "X" rail), and some grayish-silver metal (the outer "v" rails"). It seems odd to use so many different materials.
I started by trimming off every other tie with rail nippers, and then used a chisel blade to carve away any remaining spike detail.
I attempted to remove every other tie between the rails but all that did was cause one rail to pop out of the molded spikes. This required me to stop and repair it with superglue, and after that I decided to live with them. Moving on, I used stripwood to bulk out the ends of the ties. They aren't perfect but it was the best I could do.
When it came time to wire it, I saved myself some wire and installed jumpers on the two outside rails for two of the legs. That resulted in me having only four feeder wires (one outer rail on each side, one middle rail on each side) of the two closest approach tracks.
With the crossing flipped back over, I glued some thin stripwood onto the jumper with superglue to hide them. You can see one of my faux ties below, as it is the first tie to the right of the crossing guardrails. In the future I will plan where filler ties will go and then install the feeder wires between them.
Was the effort worth it? I think so. It looks a lot better than the Gargraves crossing and there is a lot more opportunity to scenic it. But it is a work in progress and I won't really know until it is finished.


No comments:
Post a Comment