Friday, July 25, 2025

A visit to Model Rail Scenes and the WW&F in 2021

Several years ago I saw an advertisements for Model Rail Scenes, a company that custom builds train layouts. They seemed to focus mainly on three rail O scale layouts, and their work was realistic and evocative of New England scenery. At the time, I decided that if I ever did build an O scale layout I would want mine to focus on the northeast. So I called the owner, Brian Inch, just to talk about basic layout concepts and such. I wasn't planning on hiring him to build a layout for me, but he models things I haven't seen elsewhere and I wanted to pick his brain. He did one better, and invited me to visit his showroom and talk with him in person. Great!... except he was 330 miles away in Augusta, Maine. 

I also had a desire to revisit the WW&F Railway in Alna, Maine. I am a lifetime member of the railroad organization but hadn't been there in person since 2017

With these two Maine destinations in my mind I just decided to go for it. The pandemic was a still a big thing at that time and I had a lot of free time. My daytrip was on a Saturday and in 11+ hours I covered almost 700 miles. I woke up early and left the house at 6:00 AM exactly. I arrived back home at 10:45 PM. But, aside from waiting in line for over 2 hours at Red's Eats for a fried chicken sandwich (which sadly I found out they were out of when I got to the front of the line!) it was a good day. Below are some pictures from my trip.

Brian's workshop display layout is 10x16', and there is a lot packed in it. It is considered an "island" style layout in that you can walk completely around it. I really liked his dock scene.

This bridge took up a lot of space but it wasn't forced into the scene, and that is what made it so realistic. Many bridges are shoehorned in by builders who want add them just because they look good without giving thought to whether the rest of the scenery would demand such a bridge be built there.

The center area is part of his old display layout that I actually saw at the Springfield, MA train show a couple of years ago. Even the tree-covered forests look good and they aren't those cheap "puff ball trees" that everyone seems to like to build.

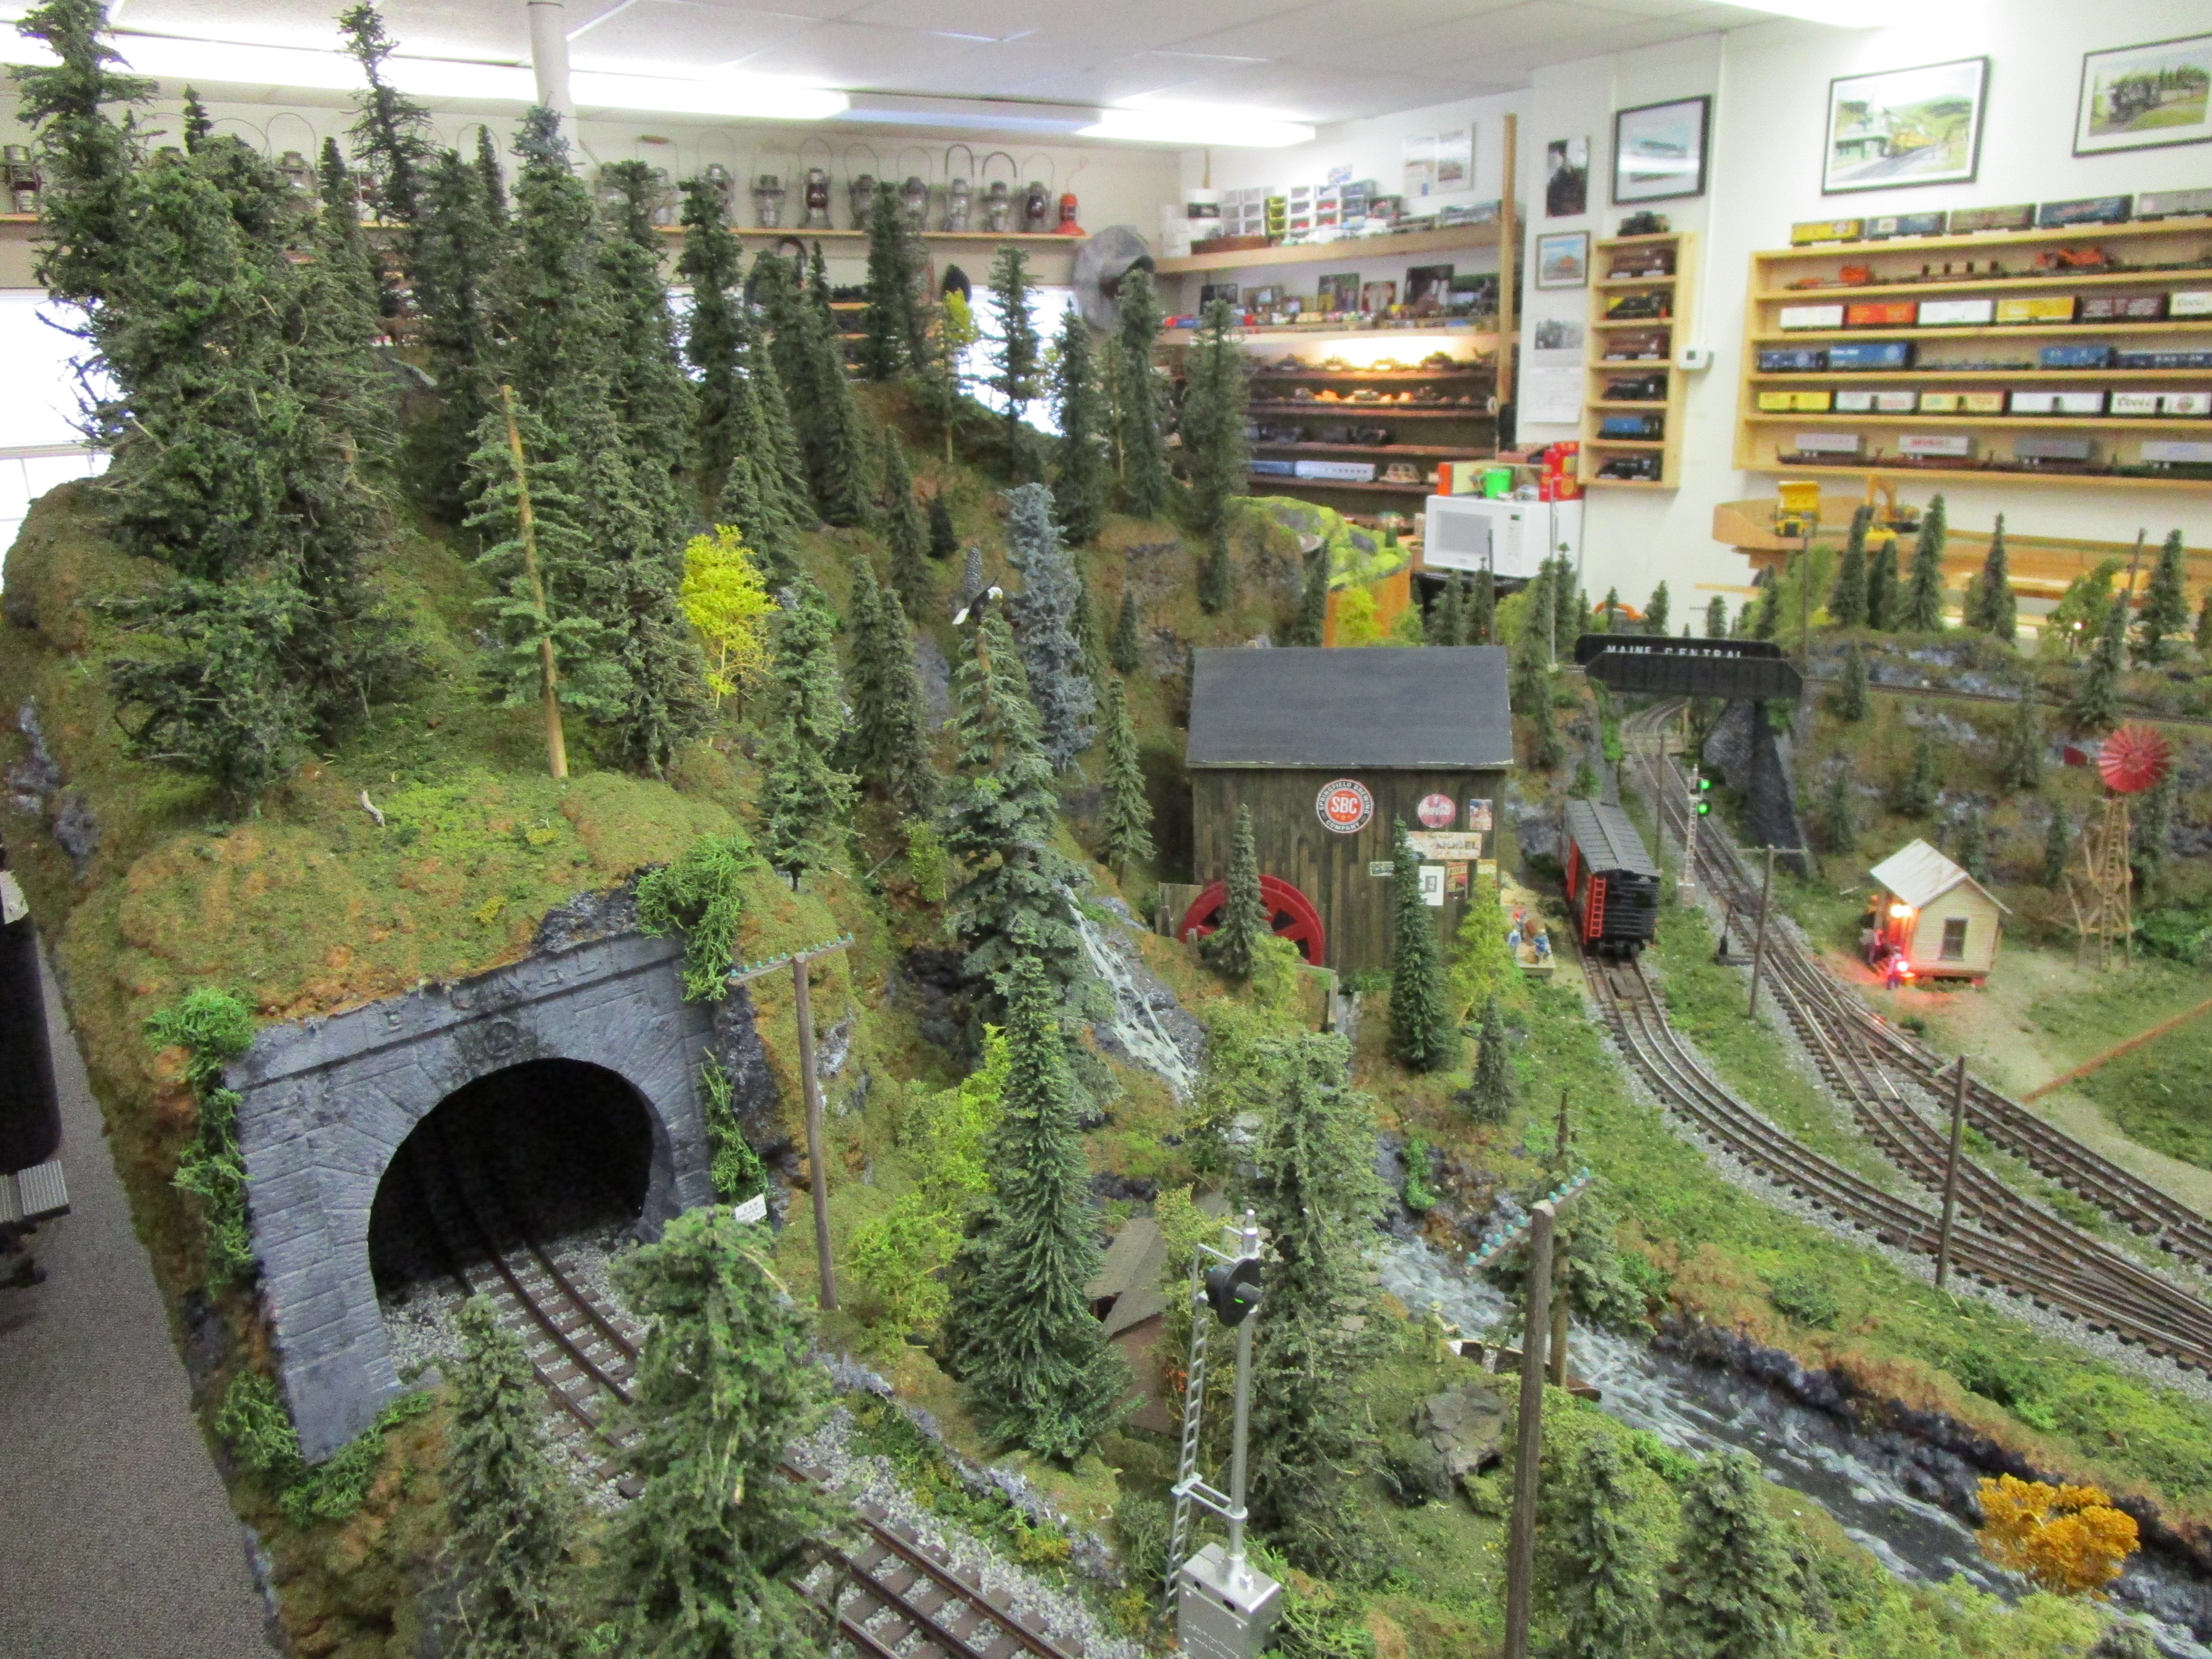
Around the layout area were display shelves filled with O scale trains that would have run on railroads in Maine. It was inspiring to see. Brian told me he did a lot of custom painting to get the trains he wanted.

Another interesting view.

After we talked for a while, I said goodbye and drove to the WW&F Railway. They were running multiple trains which required passing each other at the station stop in Alna Center. More picture of my visit can be found here.

As part of my NMRA Master Model Railroader program, I scratchbuilt an On2 model of T.C.D.A. #65. While in town, I set my own boxcar next to the real thing in Wiscasset, ME. and took a picture. 

It was a great day and I had fun talking with Brian and riding the WW&F. What I didn't realize was that my journey into O scale would begin so soon after visiting. 

Friday, July 18, 2025

Rolling Hills

With a steady supply of dirt now in hand I decided to work on some more scenery. To get my feet wet, I first did the area between the tracks on the passing siding. I focused mostly on dirt and bushes and less on grass, though static grass and clumps will come in the future. 


Then, I turned my attention to the front edge of the layout. New England scenery is anything but flat and I wanted to add a few hills and dips to reflect this. So, I picked up a piece of 1" thick green extruded foam and broke out my hot wire tool that I got for Christmas. Finally, I could use it! 

I didn't have a lot of room and I didn't want to model the Alps so I just shaved small pieces here and there to look like rising mounds of earth. I am not sure what I was expecting but the process turned out to be a bit of a letdown. Even with the heat cranked to full it wasn't terribly quick, and the cutter blade just seemed to bog down here and there. And talk about spiderwebs after... something I never saw on the Youtube videos I watched. After some online research I think I might have had the temperature too hot, so I will experiment with that in the future.


In the past, I would just heavily layered on ground goop (sometimes up to a 1/2" thick) to make my terrain undulations. It took days to dry and would sometimes crack during the process but it worked well. This foam should work better but I have to experiment more. In the end, I got some pieces that were usable and I glued them down with caulk. 

One other note: it smells like burning plastic (because it is) and I had a fan constantly blowing on my workbench while I did it. The smell didn't bother me because it reminded me of the time my father took me to work with him at Kodak and we toured the plant where they melted the plastic pellets to make disposable cameras (remember those?). I fondly remember the trip and associate the smell of burning plastic with that... but it isn't for everyone!

The next day I mixed up a batch of Ground Goop and went over them to blend them in more. The recipe for Ground Goop is found here. This time, I used some advice I found online and mixed it up in half of a cheap basketball. The theory is that after it dries you can crack out the dry remainder and use the ball again for a bowl. That didn't work... but I only paid a dollar for the ball so no real loss.


If you make the goop too thick it is hard to spread, and if you make it too thin it runs everywhere. The magic sweet spot is hard to find, but this time I changed techniques and used a cheap chip paintbrush to spread it out. That allowed me to put it where I wanted it and maneuver it where it had to go. It worked great, much better than my gloved hands or metal spatula.

I went up and down the mounds, including a small one wedged between some tracks. I didn't carve out anything below track grade on this layout section but certainly will for others.


When I ran out of goop I just kept brushing the remains of the bowl onto the foam to give me a base color and adhesive layer.


Then, on went real dirt. I didn't use my superfine stuff but instead went with the next step courser, which included very tiny pebbles and lumps. For O scale, this looks pretty good (the fine stuff is best for N and HO scale).


Added next were three colors of "fine" Woodlands Scenics turf (bright green, dark green, green blend). 


Finally, I pulled out all the stops with course turf in various colors, different bushes from several manufacturers like Woodlands Scenics and Scenic Express, and other such stuff. The greenier... the better. I am modeling fall when scenery is lush again after summer droughts but some is just starting to turn brown and die off.


The full kitchen sink was used...


For variety, I also embedded some real rocks and pebbles that I had baked in the oven along with the dirt. I even included one rock from my previous D&H layout... just to keep that alive a bit.

A healthy dose of white glue and water was necessary to keep the larger bushes in place. Then I set up a fan to blow on the layout and went to bed. And thankfully, no leaks were underneath the layout the next morning when I checked. Yay!


I'm pretty happy with the results.


The front of the layout will look a bit untidy until I install the fascia boards, but that is a long time away.


This fall, I plan to process and grind up real leaves to use as ground cover (essentially for modeling fall in New England) and also add static grass. Until then, it looks more like spring on my layout. That's okay though. I think it's pretty.


Friday, July 11, 2025

Processing real dirt

As scenery progressed I ran out of dirt and needed a lot more. I use real dirt that I dig it up and process at home. The process is described here, and must be done outdoors so nice weather is required. 

So, in March I dug some up from my "secret place" and baked it in the oven at 350 for an hour. Some people skip this step but I can't understand why. I certainly wouldn't want living organisms growing on my layout. I used cheap disposable aluminum pans from the dollar store for this. Dirt is heavy, so set them on a cookie sheet for support.

Because of the uncooperative weather we had, the dirt sat for nearly four months until a nice weekend came along in late June when I could use three different sized sieves to filter it. You need to scrape the blobs of dirt against the screen to grind them into a powder, while tossing the actual rocks out. This part absolutely needs to be done outdoors as it makes a mess and dirt blows everywhere, and the fine dirt dust creates a haze that fills the air. Don't do it when it is windy either.

My sieves are small but adequate for the job. I would love to find appropriately sized mesh screen and build some frames out of wood to increase the amount I can process at once, but I haven't found a place that sells small quantities of wire mesh. Something like this, with much finer mesh, would be great.

The result is superfine dirt, and then essentially three sizes of rocks (which might include of balls of dirt that didn't break up during the sifting process). I store it all in cheap containers from the dollar store. 

I don't use the rocks much, but I use a lot of the dirt as that is the base layer of my scenery. And now that my supply has been refilled, I can work on some more scenery projects.

Friday, July 4, 2025

Happy Fourth of July

As our nation celebrates another Fourth of July, I thought I would continue the tradition (started on my other blog) of posting an image from my collection of a bicentennial engine. 

Bangor & Aroostook GP7 #1776 (built as #573) is seen here on September 01, 1975. For those like myself who love Revolutionary War history, here is a fun nugget: the engine was named the "Jeremiah O'Brien," a Patriot born in Kittery, Maine in 1744 who later became a captain in the Massachusetts State Navy. He was in command of the sloop "Unity" when he captured the British armed schooner HMS "Margaretta" in the Battle of Machias, the first naval engagement of the Revolutionary War. 

If you want to see more interesting bicentennial engines, here are some I have previously featured on my blog: B&M GP38-2 #200 and D&H RS3m #1976 here; A&A ten-wheeler #14 here; Adirondack Scenic Railroad's 44-tonner (here); Conrail GG1 #4800 here; and Genesee & Wyoming's RS1 #30 and Alco S4 #36 here.